
Epäsuoravalo.fi
Light cove – dimensions, structure and installation steps
Sizing a light cove: box width, glare shield height and strip placement. Eight installation steps in the right order.

What a light cove is
A light cove is a box built onto the ceiling surface, closed on three sides with the open side facing upwards. The LED strip sits inside the box in a profile. The light reflects off the ceiling and falls from there into the room as even general lighting.
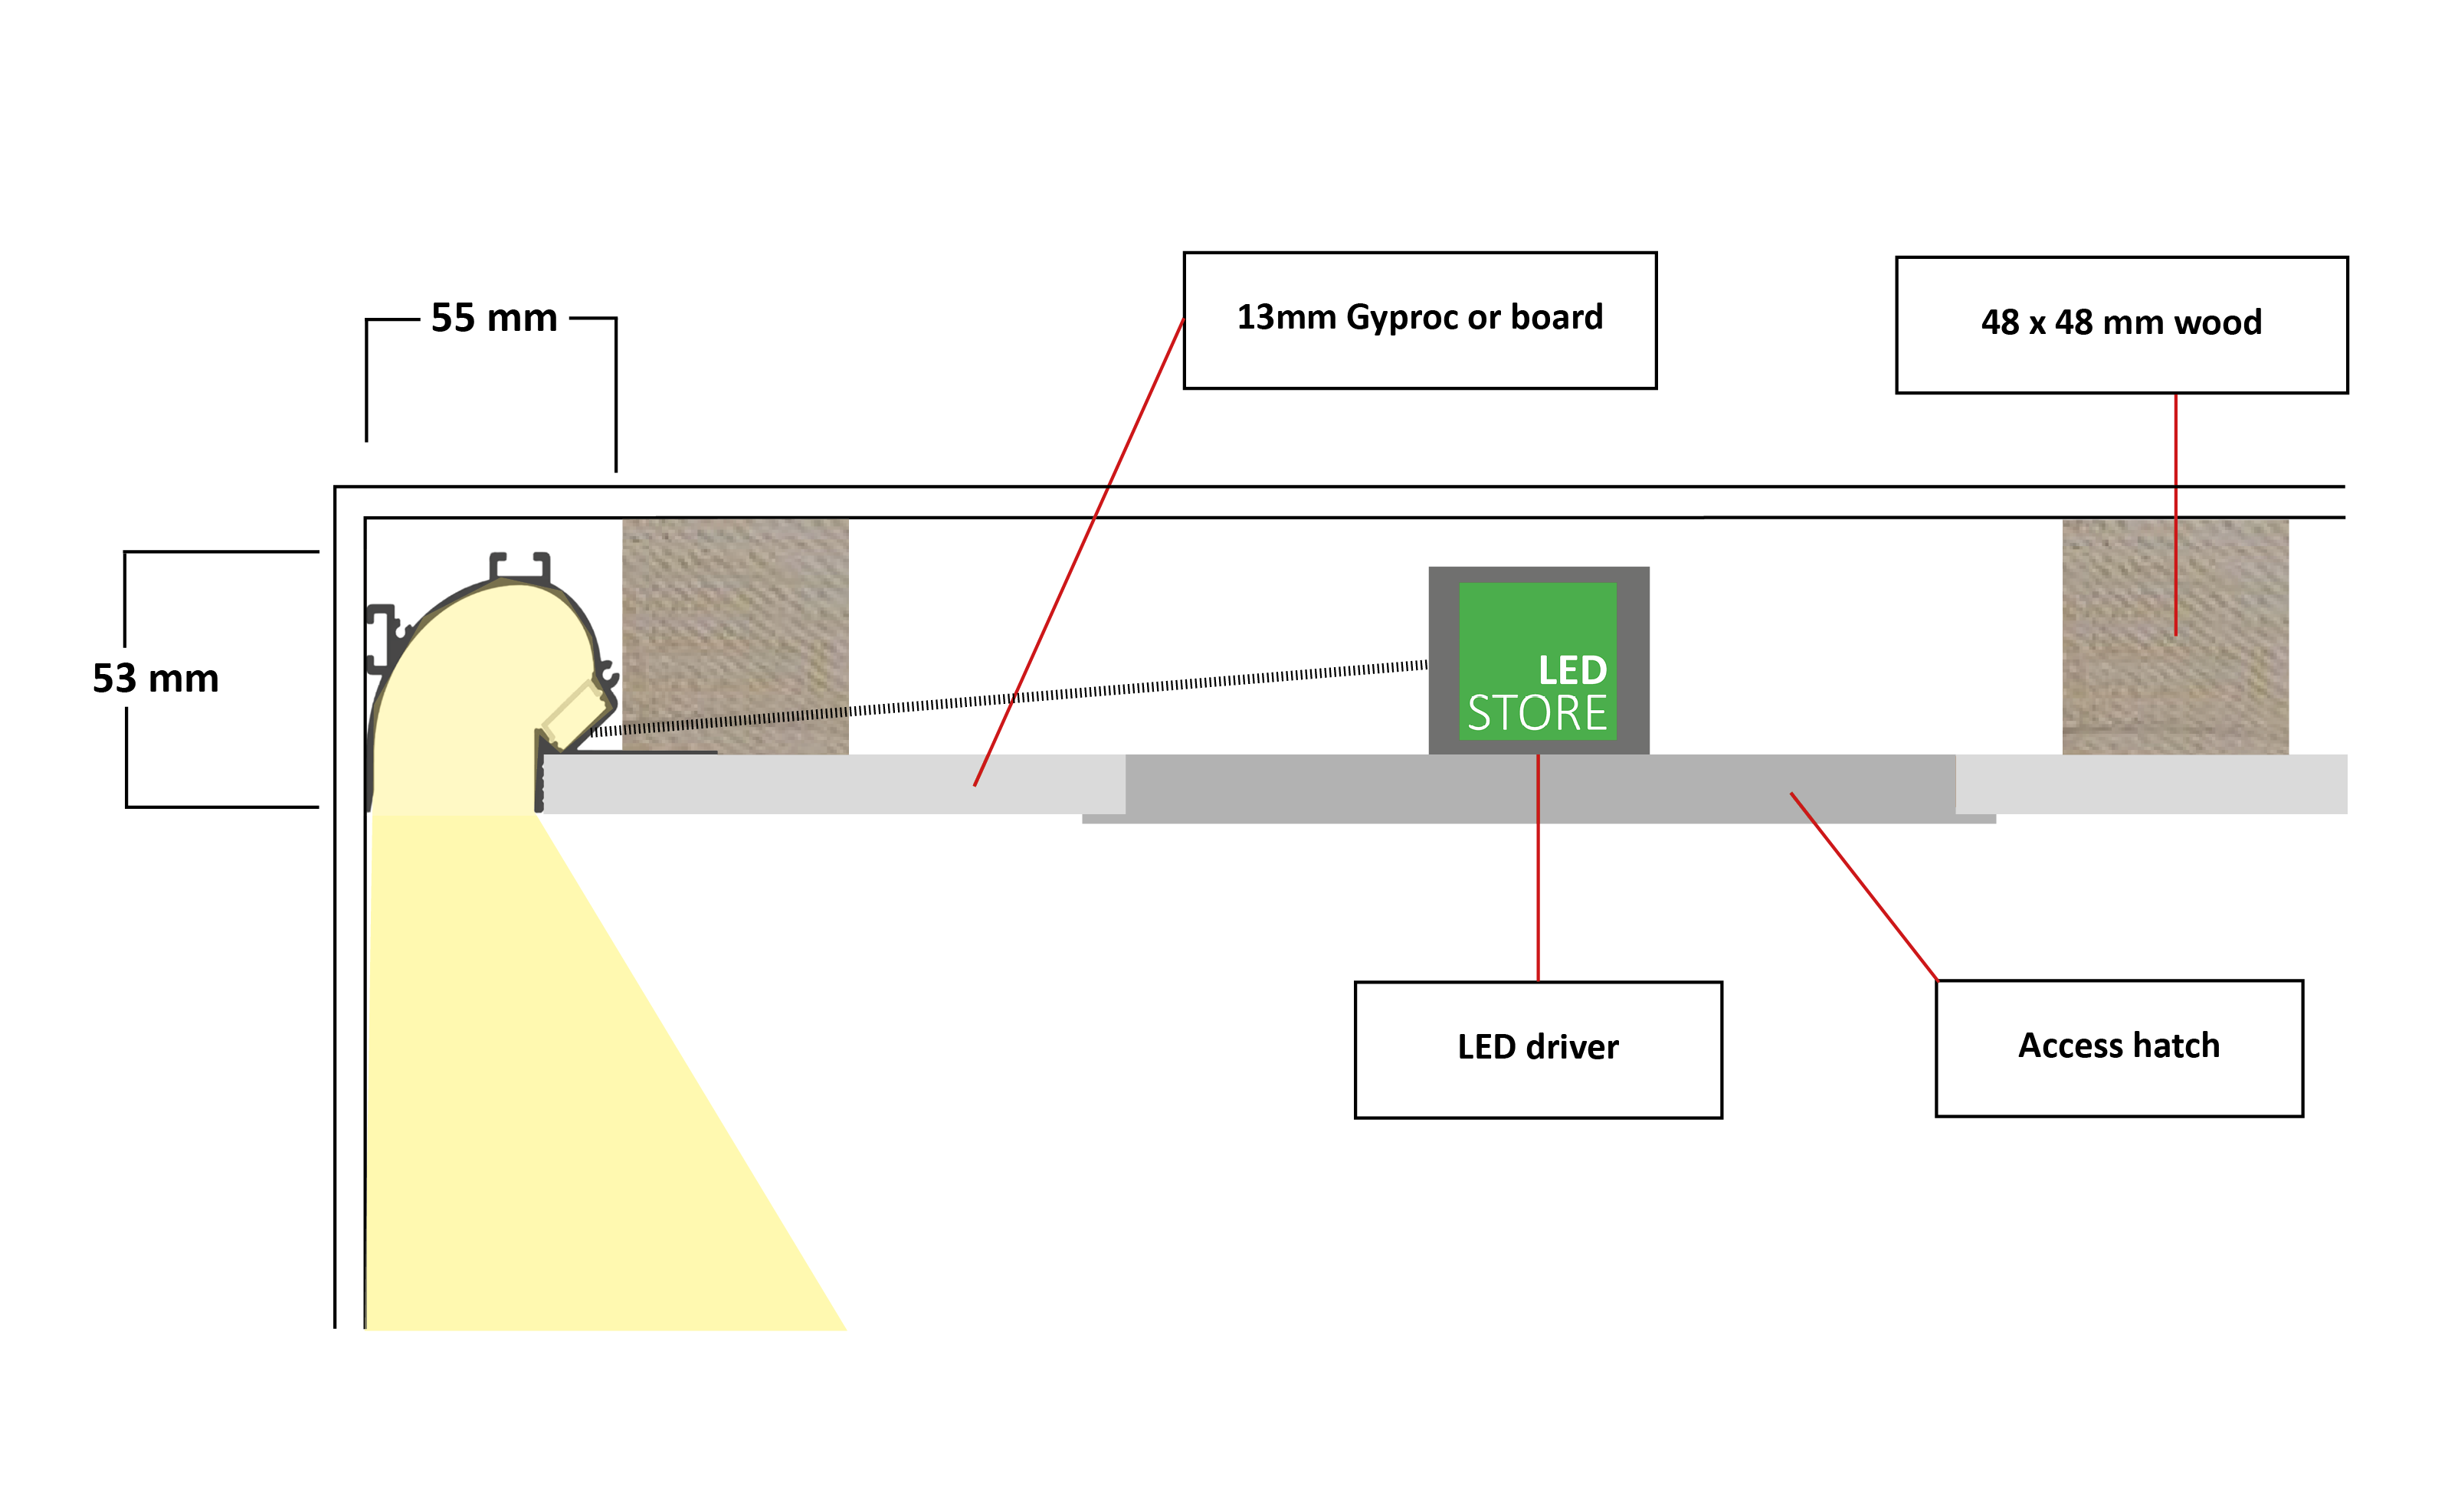
The difference from a dropped ceiling is size and purpose. A light cove is narrow, built specifically for light – typically 120-250 mm wide. A dropped ceiling is a larger structure that often has other types of lighting too.
The three sizing variables
1. Box width
The width of the opening directly affects how wide an area of ceiling the light spreads over. A box that is too narrow produces a bright band at the edge of the ceiling.
| Under 15 m² | 120-160 mm |
| Box, vertical | 80-120 mm |
| 15-30 m² (typical) | 150-200 mm |
| Box, vertical | 100-150 mm |
| Over 30 m² | 180-250 mm |
| Box, vertical | 120-200 mm |
2. Glare shield height
The glare shield is the front edge of the box that stops the strip being seen from normal viewing height. Its height depends on how far the strip is from it: 30-50 mm with the strip 40-60 mm back, 15-25 mm with the strip right behind the lip.
Verified data from a LedStore living room project: in a 295 mm box, a 120 mm glare shield. This worked in a room 260 cm high.
Sit down and check whether you can see the strip directly. If you can – the glare shield is too short. After the plasterboard work it is too late to fix.
3. Strip distance from the glare shield
Practical rule: strip at least 40 mm into the back of the box, i.e. 40 mm from the box’s back wall.
| Box width | 120-200 mm |
| Box height | 100-200 mm |
| Glare shield | 30-50 mm / 15-25 mm |
| Strip at the back | min. 40 mm |
| Framing (min.) | 48 × 48 mm |
| Profile type | 45° angle |
| Max strip width | 12 mm |
| Access hatch | Required! |
Installation steps in order
In this order – no other. Every step done in the wrong order costs later.
Cable into the box before building the frame. At this stage also decide on wired or wireless dimming – the cabling is different.
Timber framing with ceiling brackets, fixed into the ceiling joists. Use a spirit level – straightness decides how straight the line of light is.
Now, before the plasterboard. A hatch at least at each wall. There must be enough space behind the hatch for the driver.
Side wall first, then the top, the glare shield last. The front edge of the glare shield is the most critical detail – the corner must be sharp and straight all the way.
Paint the inside of the box white. The light cove is painted the same colour as the ceiling. The inner surface of the box has a significant effect on how much light is reflected.
Profile inside the box, fixings every 40-50 cm. Always a fixing at a joint. Profile and cover joints must not fall at the same point.
Strip into the profile with adhesive tape, starting from the power feed end. Three-core cable for CCT strips, two-core for single colour.
Driver behind the access hatch or outside the box – never sealed in. Test before fitting the cover. Pair the wireless controller now.
The five most common mistakes
Frequently asked – light cove
How wide should a light cove be?
120-160 mm for a small room, 150-200 mm for a normal one, 180-250 mm for a large or high room.
Can a light cove be made from MDF?
Yes, and it is often neater when the glare shield corner needs to be precise. MDF needs painting depending on humidity conditions.
How long a light cove on one driver?
With a 14.4 W/m strip and a 100 W driver, about 6 m (0.8 safety factor). On runs over 7 m, feed from both ends because of voltage drop.
Does the inside of the box need painting?
Yes, white. The inside of the box reflects light – the lightest surface gives the best result and the most light into the room.
Toteutettuja kohteita
Valokatko toteutettuna
Kipsilevykotelo katon reunassa – kuusi toteutettua valokatkoa eri tiloissa.
Kuvat: LedStore.fi toteutetuista kohteista.